
Emre Husmen - Turkish designer, who lives in Toronto, Canada. He is one of the main illustrators of the series Hot Wheels toys in Mattel Inc. In 2004, Emre took part in the competition Peugeot Design and was one of 10 finalists out of 3800 participants. He also won the competition in 2000 Trends in the design of the car. More works by this artist you can see in the gallery Emre Husmena site deviantart.com.
To begin, open your sketch in Adobe Photoshop and set the width equal to 2000 pixels. I usually work in high definition, because it allows me to create high quality images.

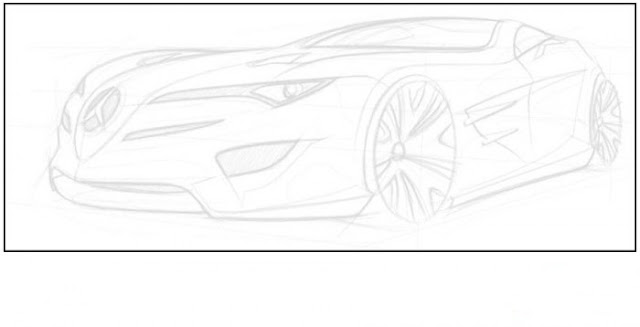
Open a new layer on your sketch and paint it white. Opacity (opacity) is approximately 85%.
 Let's start with the separation of body style. To do this, I always use the Pen tool (Pen). Select the form, open a new layer, fill in gray. And try to keep their future work lines.
 Select the form of windows, open a new layer and fill it with black.
 Do the same for the front grilles.
 Draw an ellipse for the wheels on the layer with the body and put a shadow under them.
 Highlight the headlights and chrome parts (different layers). Fill with white.
 Select the main body parts and fill them with dark or light gray, depending on their location.
 Draw more body parts with the same gray tones.
 Now start using (Dodge) and (Burn)! Draw with 200-300 pixels. airbrush (airbrush) with 20-40%(exposure). Darken the bottom part and lighten the upper. Also select an area on windows for glare, open a new layer above the windows, and with a bit of white airbrush paint over them (but not completely). Dim the spotlight.
 Find images of beautiful wheels (or draw them yourself.) Cut and paste them on the layer with the body and beat them color and contrast. Select the ellipse on the layer with the headlamp and fill it with white. Give her outer glow. Paint the window menu Hue / Saturation (Hue / Saturation) (press CTRL + U).
 Add the usual black background with white gradient.
 Determine where the light will fall. Double make a copy of each of your disks, use layers with ellipses under wheels and tires draw with brighteners (Dodge) and Burn (Burn).
 Paint the body matte colors (use the menu on the Hue / Saturation (Hue / Saturation)).
 Add more details to the body. Now it's time to polish your car. Create a new layer on the layers with a body, select and fill with white airbrush (airbrush). Finished with all parts except for the final body color. Combine all the layers, starting from the lowest layers to the most top. On different layers, leave the shadows and background colors.
 Double-duplicate "pooled strata." Paint them with the blue and yellow colors (optional). Now, you need to use an airbrush, eraser (airbrush eraser) to remove these parts with a mix of colors. Use overlapping effects (Overlay) (under the menu with the effects of the layer) for both. Add the white dots on the border for a more realistic effect of gloss (on another layer). In the end, add a reflection on the car and the background with layer effects from the menu ..
 Author: Emre Husmen (Emre Husmen), Turkey
To begin, open your sketch in Adobe Photoshop and set the width equal to 2000 pixels. I usually work in high definition, because it allows me to create high quality images.

Open a new layer on your sketch and paint it white. Opacity (opacity) is approximately 85%.


